Call it inventive, resourceful, creative or just plain
desperate (I’m kind of kidding…); pork producers have the most interesting
tricks hidden up high in those coverall sleeves of theirs. Spending time at
industry trade shows and conferences, I’ve heard a lot about different
contraptions producers have rigged up to make any job a little easier. It
always impresses me. I may be biased, but pork producers come up with some great
ideas to simplify tasks and improve their operation’s efficiency.
Oftentimes they don’t realize their own cleverness until
someone else makes a note of it. Take my dad, for instance. Most of the PigEasy
products were developed with only our farm in mind and weren’t put on the
market until an outside consultant noticed it on a walk through and mentioned
to him that it would be beneficial for other farms to use.
Today’s trick isn’t some new and exciting product we’ve
spent years developing, but it gives an example of how a little handiness can
make a huge difference in streamlining daily tasks.
When we began AI-ing sows over 20 years ago, Dad wanted to
keep the AI supplies organized and in one spot. He didn’t want that spot to be
in the way and also didn’t want it to slow down the process by keeping it stationary.
After noticing the top of the g-stalls were connected via two rods, Dad decided
to make up a tray that could use the rods as a track.
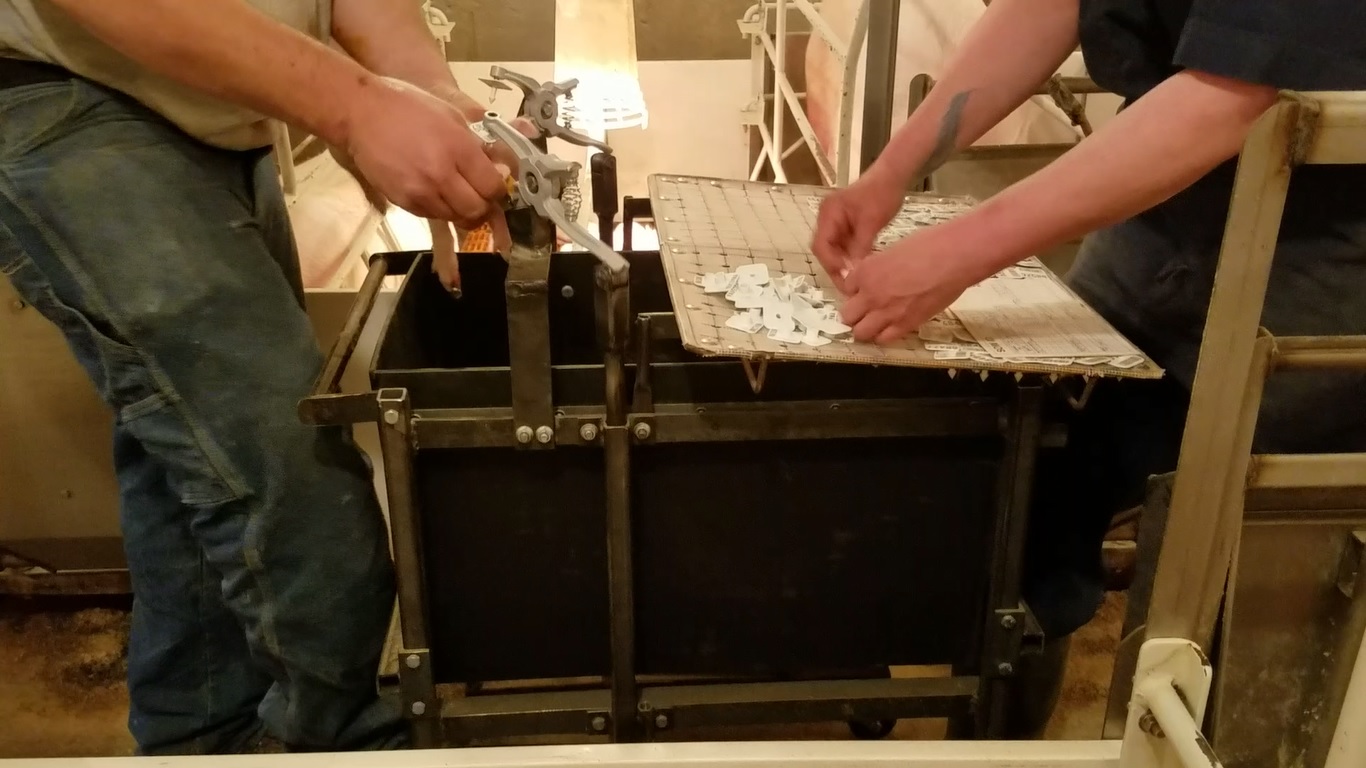
The roller tray is made from a light angle iron and
1/4" thick plastic sheet. He bought small lawn mower wheels, cut off the
rubber and installed them on a 1/2” rod.
Some simple cutting and welding is all it took to make the
roller tray and it has helped speed up and simplify AI-ing sows at KFI. We
still use the originals today.
As a pork producer, you have a never-ending list of tasks
and any tool that makes your day easier is well worth the upfront time it takes
to put it together.
That’s why we’re called PigEASY. We believe simplifying
daily chores can make a huge impact on the success of your sow farm.
KFI began a new program some time ago that required all pigs
to be tagged on both ears Day 1-2. We quickly got set up to tag hundreds of
pigs a day; everything seemed straightforward and efficient. That was until we
observed the toll it took on our staff. Our KFI crew was burning out rapidly
and who could blame them? They were squeezing the tagger on both ears of
hundreds of wiggling pigs while hunched over holding them in place. Whew!
That’s a lot to ask someone to do day in and day out.
Dave knew he had to figure out a solution when his employees
began to dread the task at hand. He had to #1: eliminate the repetitive
squeezing, #2: somehow find a way to more efficiently organize all the tags
before they are applied to the pigs, and #3: speed up the process.
With collaboration, the PigEasy ID Cart was developed. It
wasn’t surprising the benefits of using the ID Cart blossomed after using the
first prototype. Because maybe you’re like me and prefer to read fast, I
compiled a list of the Top Benefits of the PigEasy ID Cart:
1) Saves your Hands and Back
To tag pigs with the PigEasy ID Cart, the operator standing
upright, simply holds the pig in one hand, positions the ear with the other and
steps on the pedal that applies the tagger. That’s it. This means no more
squeezing and no more crouching to tag pigs. Not only do you save your hands
and back from the complications of the repetitive, strenuous task, but you also
get rid of the typical fatigue that shows up quickly into this daily chore.
What this means for you if you’re a
Sow Farm Employee:
You save your body from the arduous job of tagging and are able to be
more effective in this task and throughout your shift each day.
Sow Farm Manager/Owner:
You increase efficiency, employee morale and retention while lowering
risk of workmen’s comp issues in the future. (3 Words: Carpal Tunnel Syndrome)
2) Speeds Up the Process
The PigEasy ID Cart is set up as a two person job, so someone is always loading the taggers and the other is holding the pig and operating the foot pedals. With everything set up, in place and in close proximity, you can quickly tag a lot of pigs.
Tags are set up on the sheets prior to heading out to the
farrowing barn so organizing is done before the task begins. This makes for a
quick turnaround.
With everything operating smoothly and
efficiently without fatigue, the KFI crew can tag a litter in about 2 minutes.(This
is from the time they arrive to load the pigs in the cart, to finishing up the
paperwork after all the pigs are tagged!)
3) More Uniform Application
Now, I understand that “fast” isn’t always better. But
because the PigEasy ID Cart is operated by two foot pedals, the person tagging
can use both hands to hold the pig and ear in place. It’s a lot easier to get the
placement of the tag right when you’re not handling the tagger and the pig at
the same time.
This leads to an increase in tag retention later in the wean
to finish stage.
4) Increased Organization and Efficiency
One of the first prototypes on the farm
By having all the tags ready on the tagging sheet before you
head out to the barns, you’ll have the tags already organized before things get
hectic in the room. The tagging sheet is also designed so the tags won’t fall
out if you were to drop it.
Speaking of the tagging sheet, there are trays underneath
the hopper for 3 additional trays so you do not have to head back to the office
when you empty one. If you tag by color, you can organize each tray to a
different color and have it close by for simple switching.
Its holding hopper specifically designed for the cart is
large enough for a full litter and deep enough so they can’t jump out.
The PigEasy ID Cart tags pigs quickly, accurately, and with
a lot less effort compared to manual tagging. Take a look at this video to
watch the KFI crew tagging in action:
If you have similar problems with tattooing, no problem! We
can easily convert the ID Cart to accommodate tattooing.
When we launched PigEasy and set out to build the product line, adding the
Chuck-It Bucket was a no brainer….
Long before it ever had a name, Dad
built the Chuck-It Bucket for our sow farm to hold and handle pig mortalities
and afterbirth. He didn’t like the idea
of full 5 gallon buckets spending days near the door waiting for the skid
loader; the sight and the smells aren’t good for our employees and it’s simply
inefficient. Then you have the issue of
the loader bucket. Who wants to clean that out twice a week or leave it dirty?
Of course a simple dumpster wouldn’t do for Dad. It had to
completely empty so nothing could be left in to rot. The skid loader driver
also needed to be able to drive right up to it and move it out of the
bio-secure area.
The very first proto-type we've used on our farm for
the last 20 years!
Dad has updated the design since our very first prototype.
But like with all of our products, the original is still used on the farm. This
dumpster has lived through a lot and still works like a charm 2 decades later.
On the farm and with PigEasy, we're all about making jigs to get the job done a little faster and a lot more smoothly. Templates also make each hole and cut more uniform, saving time later on during installation. I have to say spending time making up jigs and templates originally sounded like a lot of excess work to me. I'd rather just jump in and get moving on the project, whereas Dad would gladly spend a couple hours making up the jig to perfectly fit the piece. Can you guess which one of us had the wrong idea? Abraham Lincoln had a perfect quote for this: "Give me six hours to chop down a tree and I will spend the first four sharpening the axe." - Abraham Lincoln Even though I quickly jumped on board with the their way of thinking, it still baffles me at the amount of jigs and templates we have down at the shop. In addition to a drawer full, you can find templates and jigs all around that are used daily. Having been there/done that with the farm, we have some templates ready to go for installation of PigEasy products.
The SnoutSpout template is a simple metal plate that fits snugly on the side of the SnoutSpout. Once you figure out how to install one SnoutSpout, drill those holes through the template and away you go preparing them for installation in the shop instead of at the site.
This template for installing the Lactation Boot on the outside of an existing feeder took some time to design. It's made with an option to either drill through the hole or a punch out to quickly plasma cut the hole for the Lactation Boot to stick through.
We also use a template for installing the water brackets on lactation feeders that's really simple and easy to adapt to any style. That's the end goal with everything we develop and make here at PigEasy. We spend those 4 hours sharpening the axe so you can cut down that tree in two. Until next time, Katie
You can find PVC Glue at your local plumbing or
hardware store.
Tuesday's Trick of the Trade
You may have noticed our Tricks of the Trade so far have
focused on stainless steel and how to overcome the issues that arise when using
the material. While it’s not a
producer’s goal to torment themselves and their help, the benefits of stainless
steel certainly outweigh its headaches.
Today we're talking nuts and bolts... literally. We've all been in a situation where you are tightening or removing a stainless steel nut to/from a stainless steel bolt and even though they are both new, they seize together before you get anywhere, especially when using an impact wrench.
Here's a trick I’ve learned
years back to prevent stainless steel threaded nuts and bolts from seizing.
PVC Glue (Cement)
Prior to threading on a stainless steel nut, apply a small
amount of PVC glue to the first half of the threads with the brush.
Fasten the nut and go!
The glue helps lubricate, keeps the material cool and
reduces friction, which prevents the nut from seizing onto the stud/bolt.
PVC Glue also works when you are trying to unfasten a
previous stainless steel nut and bolt.
Apply the glue to the rest of the threads before removal.
Nut and bolt stayed cool to the touch and removed
easily with the PVC Glue.
Since Katie didn't believe me, I fastened and unfastened another bolt without the glue and the nut got hot and seized up on me before I could get it off. A brother's favorite victory is proving his sister wrong!
Without the glue, the nut seized onto the bolt and was hot to the touch.
We have used this on many projects and this is our go to when
using stainless on stainless fasteners.
Stainless steel is a great thing. It doesn’t rust and is
very sturdy; two material qualities that are important when working with hogs.
Where stainless can go wrong is during threading. Whenever we are at a show and mention a
nipple seizing up on a stainless steel fitting, every producer winces because
they themselves have been out in a G barn trying to unplug a nipple and nothing
short of cutting it off will fix it.
This is one of the reasons we developed the SnoutSpout nipple
bracket. It is made of glass filled polypropylene, a fiber infused plastic that
is extremely sturdy yet cuts like wood.
Now for the best part; the stainless steel nipples won’t seize up on
you!
The next question we typically get is whether or not to use
Teflon tape to seal the nipple to the bracket.
A plumber friend of mine recently cleared up a minor
misconception of threading.
Teflon Tape or Pipe Thread Sealant
The purpose of Teflon Tape is not to seal threads, rather it
is to stop the two fittings from seizing together. It may help with sealing, but that is not its
main purpose. If you are going to use a
stainless steel nipple with a stainless steel fitting, the best product to use
would be Teflon Tape alone or in combination with some pipe thread sealant.
Pipe Thread Sealant, though, is made to fill in the possible imperfections of threads of a male or female fitting to stop leakage around
them. This is what we suggest you use
with the SnoutSpout, as there’s no concern of the nipple seizing inside its female threads.
Now we have a trick for applying Pipe Thread Sealant. Instead of applying directly
to the male threads of the nipple, we found it’s advantageous to apply the sealant around the first few thread grooves of the female fitting (SnoutSpout). As you
turn to insert the nipple, the sealant spreads around on the inside, instead
of being pushed to the outside, as it can be when applying directly to the male threaded nipple.
Ben likes to add that if you are in a jam in the barn, latex
hog marking chalk is a good substitute for pipe thread sealant.
Stainless steel is the material of choice for many purposes
in a hog barn. What would hog production be without stainless steel? But then
there comes a time when you need to repair or remodel the stainless steel equipment
and your first thought is, “Well, I better buy a lot of bits.”
When you take up this nearly impossible task, the typical
guy response to material resistance is to run the drill faster while pushing
harder. You shift it up to the highest speed. (At Klocke Farms, the term would
be “letting it rip, tater chip!”) Within seconds, the tip of your drill bit
looks more like a branding iron, blazing red.
You mutter, “I’ll sharpen that up someday” as you place it in the drawer
also known as the Drill Bit Graveyard.
A few years back someone gave me this tip. It has benefited
me greatly and I’d like to pass it on to you.
PVC Cleaner
PVC Cleaner can be found at your local
hardware store or plumbing retailer.
DISCLAIMER*** PVC cleaner is flammable. You need to keep
this in mind as a spark could cause a serious problem. I’ve never had any
issues with it, but it is important to take note and be cautious.
1. You need to start
with a good quality drill bit. Top of the line is not a necessity, but now that
you won’t be going through a bunch of them, you can spend more money on
quality.
2. Next, you need a
little bit of patience. It does require stopping several times to reapply the
PVC cleaner for every hole you drill, depending on the thickness of the steel. I’m not sure why it works, but it seems to me
that the cleaner keeps the bit cool to prevent the cutting edge from being
burnt or damaged from overheating.
3. Typically it is
best to start with a center punch to make a point or divot to prevent the drill
bit from walking on you.
4. Dip your drill bit
into the PVC cleaner and start drilling. Using your variable speed trigger
while applying appropriate down pressure, vary the speed of your drill bit
until you find the speed that gives you the best results. It is typically lower
to mid speeds and not wide open. It will drill well for several seconds, but
the cleaner will wear off, so you may have to dip it a couple times when drilling
the hole.
I’ve found it better to stop drilling and dip your bit more
often than not. It will keep your good bit cutting and working much longer and
your sanity intact!
PVC cleaner on a drill bit will not make a bad bit work well.
Once the bit is dull, into the graveyard it goes, so that’s why it’s important
to start off with a good bit.
If you do this and dip often, you’ll be able keep
that bit in use much longer. While we haven't personally tested it out, our feeder manufacturer recently recommended Elmer's Glue as an option. What trick do you have for drilling through stainless steel?